

Learn how to find and fix a water leak in your home fast. Protect your property and save on repair costs with our easy, step-by-step guide!
TL;DR:
- Hidden leaks can cause significant damage and high water bills if not detected early.
- Confirm leaks using water meter tests and visual inspections before professional repairs.
- Professional detection tools are recommended for underground or slab leaks, which are complex to fix DIY.
A water leak you can’t see is still doing damage. In San Antonio, where clay-heavy soil shifts with every rain cycle and drought, pipes face constant stress that can open cracks long before you notice a wet spot on the floor. By the time most homeowners realize something is wrong, they’re looking at a spiked water bill, potential mold growth, and repair costs that could have been a fraction of the price with earlier action. This guide walks you through exactly how to spot, confirm, locate, and fix a water leak in your home, step by step, before it turns into a serious problem.
Table of Contents
- Warning signs: How to spot a water leak early
- Step 1: Confirm you have a leak with a water meter test
- Step 2: Pinpoint the source — Indoors, outdoors, and hidden
- DIY repairs: What to fix yourself (and what to leave to the pros)
- Long-term prevention: Stop future leaks before they start
- What most people get wrong about finding and fixing leaks
- Get expert help for your San Antonio water leak
- Frequently asked questions
Key Takeaways
| Point | Details |
|---|---|
| Catch leaks early | Spotting signs like higher bills or green lawn patches reduces costly damage. |
| Use your water meter | A simple water meter test clearly confirms if you have a hidden leak. |
| Know your limits | DIY works for small, visible leaks—hidden or slab leaks need professional help. |
| Prevent future issues | Monthly monitoring and annual inspections lower your long-term risk. |
Warning signs: How to spot a water leak early
San Antonio’s clay soil is a unique challenge for homeowners. When it rains, clay expands. When it dries out during a drought, it contracts. That constant movement puts stress on your pipes, especially older copper or galvanized lines that run beneath slabs or through walls. The result is a higher-than-average rate of hidden leaks that can go undetected for months. Our water leak detection tips cover the local conditions in more detail, but here’s what to watch for first.
Common early warning signs of a water leak:
- A water bill that’s suddenly higher with no change in household usage
- A musty or moldy smell in rooms that don’t have obvious moisture sources
- Visible mold or mildew on walls, ceilings, or under cabinets
- Warm or soft spots on your floor, which can indicate a slab leak below
- Unexplained wet patches on drywall or ceilings
- Peeling paint or bubbling wallpaper with no other cause
- Unusually green or lush patches of grass in your yard, especially in dry weather
- Soggy soil or standing water near your foundation or along your water line
Statistic: The EPA estimates that household leaks can waste nearly 10,000 gallons of water per year in the average home, and 10 percent of homes have leaks that waste 90 gallons or more per day. That’s money literally going down the drain.
For quick DIY checks, start with your toilets. Add a few drops of food coloring to the tank, do not flush, and wait 10 to 20 minutes. If color appears in the bowl, your flapper is leaking. Next, inspect under every sink, around your water heater, and near appliances like dishwashers and washing machines. Look for drips, stains, or moisture buildup. Then step outside and walk your yard, checking for green patches, wet soil, or puddles that don’t match recent rainfall.
Pro Tip: Do your outdoor survey early in the morning before the sun dries up surface moisture. Wet soil near your meter box or along your property line is a strong indicator of an underground leak worth investigating.
If you suspect something is happening underground, our guide on how to find underground leaks gives you a deeper look at what to check before calling in a professional.
Step 1: Confirm you have a leak with a water meter test
Before you start tearing apart your home looking for a leak, confirm one actually exists. The water meter test is the most reliable DIY method available, and it costs you nothing but a few minutes.
Here’s how to do it:
- Locate your water meter, usually near the street at the edge of your property inside a concrete box.
- Make sure all water inside and outside your home is turned off. No running faucets, no appliances pulling water, no irrigation systems.
- Note the exact meter reading, or look for a small leak indicator dial or triangle on the meter face.
- Wait 30 to 60 minutes without using any water. The longer you wait, the more reliable the result.
- Return and recheck the meter reading. If the numbers have changed or the indicator dial has moved, you have an active leak somewhere in your system.
| Meter behavior | What it likely means |
|---|---|
| No change after 60 minutes | No active leak detected |
| Slow movement, indicator spinning | Small but active leak present |
| Fast movement, numbers climbing | Significant leak, act quickly |
| Movement only after reopening main | Possible appliance or fixture issue |
Pro Tip: If the meter stops moving when you shut off your home’s main shut-off valve but keeps moving when it’s open, the leak is between the meter and your house. That section is your responsibility as a homeowner. If the meter moves even with your main valve closed, contact San Antonio Water System (SAWS) to report a possible meter-side issue.
For a more detailed leak test process, including how to isolate specific zones of your plumbing, we’ve put together a full homeowner’s guide that walks through each scenario.
Step 2: Pinpoint the source — Indoors, outdoors, and hidden
Now that you’ve confirmed a leak exists, it’s time to track it down. This is where homeowners often get frustrated because leaks don’t always announce themselves. A pipe dripping inside a wall can travel several feet before showing up as a stain on the ceiling below.
Start with the simple, visible checks:
- Run your hand along supply lines under sinks and behind toilets, feeling for moisture
- Check the base of your water heater for rust stains or pooling water
- Inspect washing machine hoses for cracks or bulging
- Look at your outdoor hose bibs (the spigots on your exterior walls) for dripping after the hose is disconnected
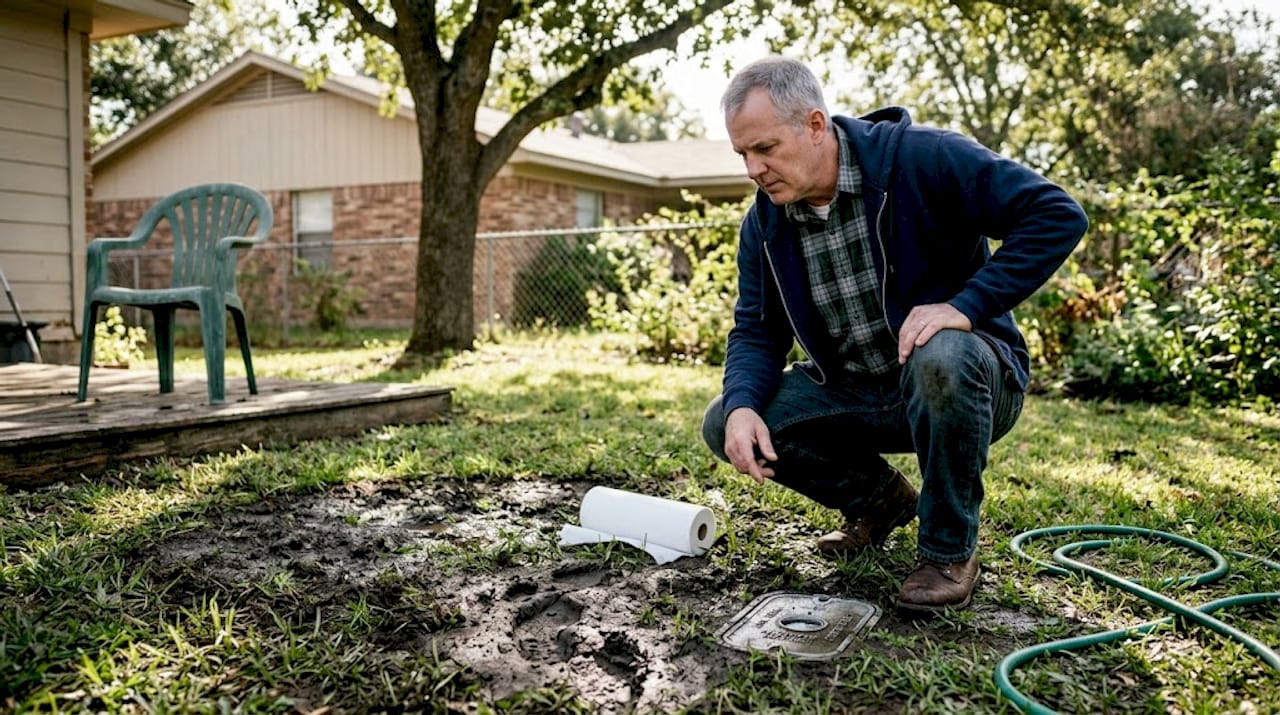
- Walk your yard again looking for green patches, wet soil, or depressions in the ground that signal an underground line issue
For outdoor leaks that are harder to see, pay attention to your yard’s behavior after a dry stretch. If one section stays green while the rest browns out, that’s a classic sign of water feeding that area from below.
| Leak type | DIY detectable? | Tools needed | Recommended action |
|---|---|---|---|
| Toilet flapper leak | Yes | Food coloring | Replace flapper yourself |
| Faucet drip | Yes | Visual inspection | Replace washer or cartridge |
| Under-sink supply line | Yes | Flashlight, paper towel | Tighten fitting or replace line |
| Water heater leak | Partially | Visual inspection | Call a plumber if at tank |
| Slab leak | No | Infrared camera, acoustic tools | Call a pro immediately |
| Underground main line | No | Pressure gauge, acoustic listener | Call a pro immediately |
When basic visual checks don’t reveal the source, professionals use tools that go beyond what any homeowner can reasonably access. Advanced detection equipment includes moisture meters that detect damp materials behind walls, acoustic listeners that pick up the hissing sound of pressurized water escaping a pipe, thermal imaging cameras that identify temperature differences caused by wet areas, and pressure gauges that isolate which zone of your plumbing is losing pressure.
“Thermal imaging and acoustic detection allow us to find leaks without opening walls unnecessarily. That saves homeowners significant time and money compared to the old method of cutting drywall and guessing.” — Stultz Plumbing technician
If you’re listening for leaks and hear a faint hissing or dripping sound inside a wall, don’t ignore it. That sound is pressurized water escaping, and the longer it runs, the more damage accumulates inside your structure.
For underground issues specifically, our resource on detecting underground leaks explains what professional acoustic detection looks like and why it matters for San Antonio’s soil conditions.
Pro Tip: Place dry paper towels or tissue paper under suspect pipes and check them after an hour. Even a slow drip will leave a mark on dry paper long before it’s visible to the naked eye.
DIY repairs: What to fix yourself (and what to leave to the pros)
Once you’ve found the leak, the question becomes: can you fix it yourself? The honest answer is, it depends entirely on where the leak is and how complex the repair is.
Repairs most homeowners can handle:
- Toilet flapper replacement. If the food coloring test confirmed a flapper leak, turn off the supply valve behind the toilet, flush to drain the tank, and swap the old flapper for a new one from any hardware store. This takes about 15 minutes and costs under $15.
- Faucet washer or cartridge replacement. A dripping faucet is usually a worn washer or O-ring. Shut off the supply valve, disassemble the handle, and replace the worn part. Most hardware stores carry universal replacements.
- Tightening compression fittings. Sometimes a fitting under a sink just needs a quarter-turn with a wrench. Don’t overtighten, but snug is fine.
- Replacing a flexible supply line. The braided stainless lines connecting your shut-off valve to your toilet or faucet are inexpensive and easy to swap out. If yours looks corroded or bulging, replace it now.
Statistic: A single leaking toilet can waste up to 200 gallons of water per day. Fixing it yourself in 15 minutes can save you hundreds of dollars on your next SAWS bill.
What you should not attempt yourself:
- Slab leaks require specialized equipment to locate and repair without tearing up your entire floor. San Antonio’s shifting clay soil means the pipe may have moved, making the repair geometry complex.
- Main line breaks or underground leaks involve excavation, pressure testing, and often permits. A wrong repair can shift your foundation.
- Any leak inside a wall that requires cutting drywall should involve a professional assessment first to confirm the exact location.
Understanding leak repair costs before you start helps you make a smarter decision about when DIY saves money and when it creates more expensive problems down the road.
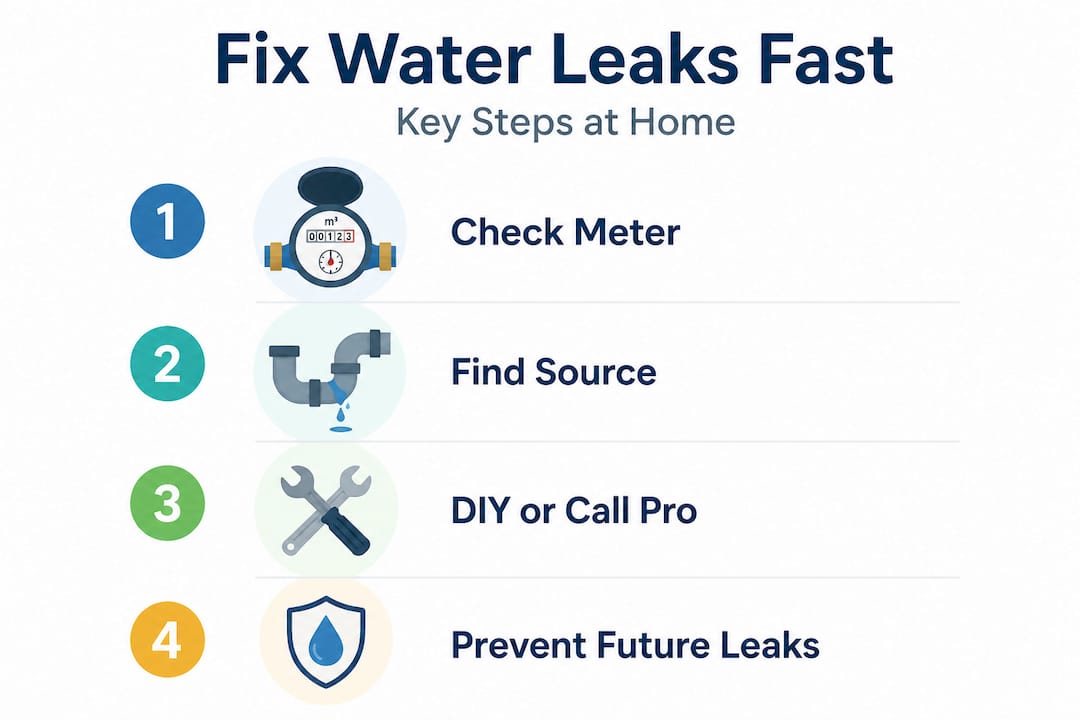
Pro Tip: If you’re unsure whether a repair is within your skill level, shut off the water to that fixture and call us. Stopping the water flow immediately limits damage while you figure out the next step.
Long-term prevention: Stop future leaks before they start
Finding and fixing a leak is only half the job. The other half is making sure it doesn’t happen again, or at least catching the next one before it gets expensive.
Practical prevention habits for San Antonio homeowners:
- Check your water bill every month and flag any increase of 10 percent or more with no clear cause
- Walk your meter box monthly and look for the leak indicator dial, even when you haven’t noticed any symptoms
- Install smart leak detectors under sinks, near your water heater, and behind appliances. These small sensors alert your phone the moment they detect moisture
- Consider an automatic shut-off valve on your main line. These devices detect abnormal flow and cut your water supply before a burst pipe floods your home
- Schedule a professional plumbing inspection every year, especially if your home is more than 20 years old or has experienced leaks before
The EPA recommends monthly meter monitoring and annual professional inspections as the most effective combination for catching leaks early and reducing long-term repair costs.
SAWS has specific responsibilities and programs worth knowing. According to SAWS leak adjustment policy, the utility handles everything from the main line to your meter. From the meter to your house, that’s your responsibility. If you spot a leak in the street or near the meter box, call SAWS at 210-704-SAWS. If you’ve repaired a leak and your bill spiked because of it, SAWS may offer a leak adjustment credit once per year with documentation of the completed repair, covering up to two months of elevated usage.
Pro Tip: Keep a photo record of your repair with the date and receipt. SAWS requires documentation to process a leak adjustment, and having everything organized speeds up the credit process significantly.
For situations that escalate quickly, knowing your emergency plumbing options in advance can save you from making a panicked decision when water is actively spreading through your home.
What most people get wrong about finding and fixing leaks
Here’s the uncomfortable truth we see regularly: most homeowners don’t act until the damage is already significant. They notice the higher water bill and assume it’s a meter error. They smell something musty and blame the weather. They see a small stain on the ceiling and decide to watch it for a few weeks.
That wait-and-see approach is one of the most expensive decisions a homeowner can make. A slow slab leak, for example, doesn’t just waste water. It softens the soil beneath your foundation, and in San Antonio’s clay-heavy ground, that instability can lead to foundation movement. What starts as a $400 pipe repair can become a $15,000 foundation problem if left alone for six months.
We also see homeowners underestimate how different San Antonio’s soil conditions make their situation compared to other cities. The expansion and contraction cycle here is relentless. Even newer homes with quality pipes experience stress fractures over time simply because the ground beneath them won’t stay still. That’s why slab leak warning signs in this city deserve more attention than most homeowners give them.
The other mistake we see constantly is over-reliance on DIY for leaks that genuinely need professional tools. There’s no shame in fixing a toilet flapper yourself. That’s smart and straightforward. But using a wrench on a fitting you can’t fully see, inside a wall, near a slab, is a recipe for a much bigger problem. Knowing where your skill level ends is just as important as knowing how to use a wrench.
Fast action, whether that means a 15-minute DIY fix or a same-day call to a plumber, is always the right move. Hesitation is what turns a manageable leak into a restoration project.
Get expert help for your San Antonio water leak
When a leak goes beyond a toilet flapper or a dripping faucet, you need a team that knows San Antonio’s plumbing challenges inside and out. At Stultz Plumbing, we use advanced detection equipment to locate leaks without unnecessary damage to your home, and we respond fast because we know every hour matters. Whether you’re dealing with a suspected slab leak, an underground main line issue, or just want a professional set of eyes on your plumbing before a small drip becomes a big repair, our team is ready to help. Explore our affordable plumbing services or reach out directly for emergency plumbing help when you need someone on-site fast. We serve homeowners across San Antonio and surrounding communities with transparent pricing and workmanship you can count on.
Frequently asked questions
How can I tell if my water leak is inside or outside my home?
Close your home’s main shut-off valve and check the meter after 30 to 60 minutes. If the meter still moves with the main valve closed, the leak is between the meter and your house, which is outdoors. If it only moves when the valve is open, the leak is inside.
Can I fix a water leak in a slab or underground myself?
No. Slab and underground leaks require professional equipment to locate accurately and repair safely, particularly in San Antonio where shifting clay soil makes improper repairs a risk for foundation damage. Surface leaks at fixtures or supply lines are reasonable DIY projects.
What tools do plumbers use to find hidden water leaks?
Professionals use acoustic listeners, moisture meters, thermal imaging cameras, and pressure gauges to find leaks without opening walls or floors. These tools allow noninvasive detection that pinpoints the exact location before any repair work begins.
Does SAWS offer help or credits after a leak is repaired?
Yes. SAWS leak adjustments are available once per year with documentation of the completed repair, and the credit can cover up to two months of elevated water usage caused by the leak. Contact SAWS directly after your repair is complete to start the process.
Recommended
- How to Detect Water Leaks in San Antonio Homes?
- How to Detect Water Leaks in San Antonio Homes?
- Read Basement Water Leak Repair Guide For San Antonio Homes
- How to find a water leak underground in San Antonio
- Leak detection explained: Protect your home from water leaks
- Solve common plumbing problems: practical tips for LA homes
Jean runs growth strategy at AimSetWin, a performance marketing agency specializing in local service businesses across Texas. he's helped plumbers, HVAC companies, pest control operators, and home service brands build predictable revenue systems using data-driven advertising and conversion optimization.


